All websites hosted through White Oak Technology Group are also eligible to take advantage of our email hosting services. Email addresses can be configured to match your website address (e.g. [email protected]). Call our White Oak Support Center at (309) 662-8243 to set up your account(s) today.
Once your accounts have been created, they can easily be set up and accessed using PC based software such as Microsoft Outlook or from your mobile device. Email may also be accessed through the White Oak Webmail Client using any modern internet browser. Please follow the links below for information about the various ways to access your email. If you have problems using the White Oak email service, please review the information in the links below. If you are still experiencing issues after confirming your settings, you may call White Oak Support at (309) 662-8243 (standard support fees apply).
Outlook Email Configuration
Setting up an account in Microsoft Outlook 2010
Outlook 2010 Email Configuration
Need a paper copy? Click Here
This tutorial will assist you with setting up Outlook to send and receive email from the White Oak Technology Group mail servers. This tutorial contains screenshots from Outlook 2010 but should be helpful for any version of Outlook.
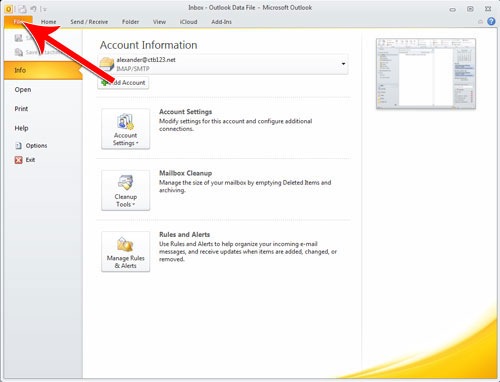
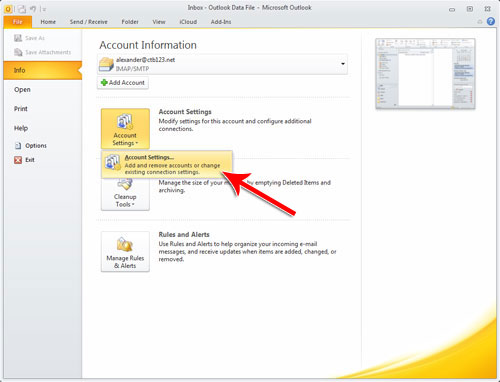
First, open Outlook and go the Account Settings option. In Outlook 2010, click File in the upper left hand corner and then select Account Settings.
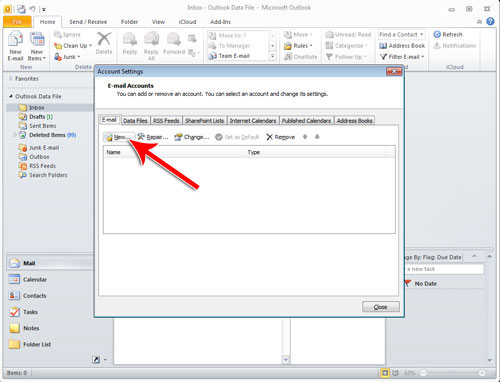
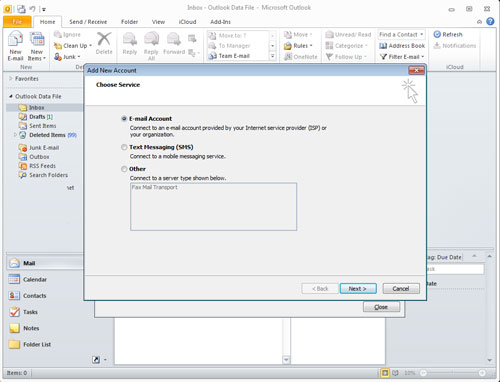
Once the Account Settings window is open, click the New... button to open up the Add New Account wizard.
Click the Next button to create a new E-mail Account.
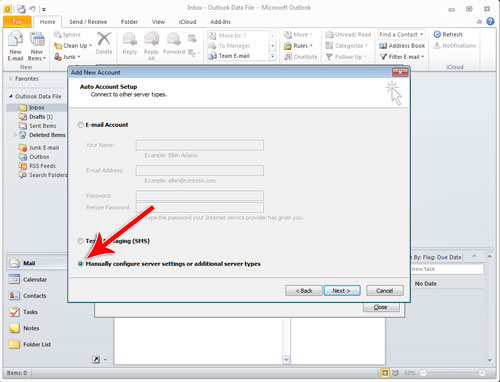
Select the option to Manually configure server settings or additional server types and then click the Next button.
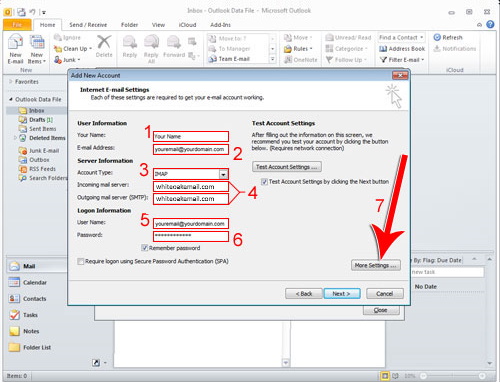
In the Internet E-mail Settings window, enter the following information into the fields. (The steps correspond with the numbers in the picture below.)
- Your Name: Enter your name as you would like it to appear in emails.
- E-mail Address: Type in your full email address (e.g. [email protected].)
- Account Type: Leave IMAP selected. (For custom POP3 configurations, please see the section below titled "Other Clients and Port Settings".)
- Mail Servers: For both the incoming and outgoing servers enter in: whiteoakemail.com
- User Name: Type in your full email address. (e.g. "[email protected]" NOT "youremail".)
- Password: Type in your email password as provided by White Oak Technology Group.
- Click the More Settings... button.
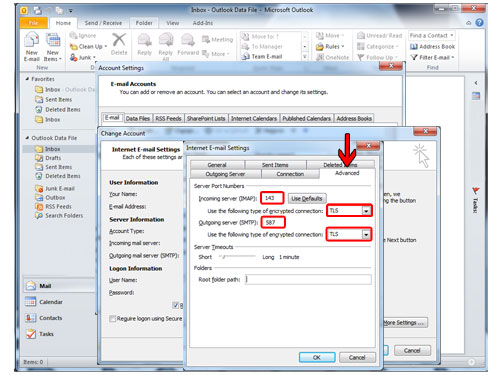
After clicking More Settings..., go to the Advanced tab. First, change both encryption dropdowns to TLS for the incoming and outgoing servers. Then change the port input boxes accordingly:
Incoming server (IMAP): 143
Outgoing server (SMTP): 587
Note: If you change the port numbers first and then change the encryption drop downs, Outlook will change the ports back to their default values. Please double check your settings before moving on.
(See the section below titled "Other Clients and Port Settings" for more information on port values.)
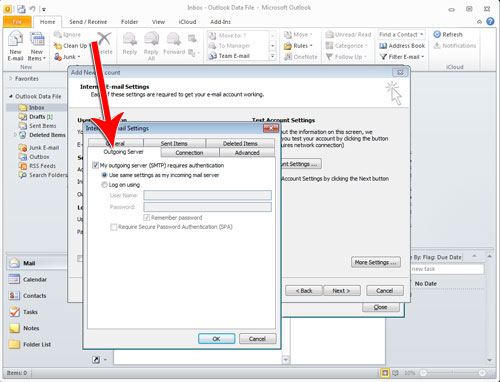
Now, click the Outgoing Server tab, and make sure the box for My outgoing server (SMTP) requires authentication is checked/turned on. Leave the option for Use same settings as my incoming mail server selected as shown below. Close the window by clicking OK.
At this point, all of your settings are now configured. To double check your settings, you may click the Test Account Settings... button. Otherwise, click Next and Finish to complete the wizard. Then click Close to return to your inbox. You will now be able to send and receive email!
As always, call White Oak Technology Group Support at (309) 662-8243 if you need any assistance (standard support rates apply).
Setting up an account in Microsoft Outlook 2019
Outlook 2019 Email Configuration
Need a paper copy? Click Here
First, open Outlook and go the Account Settings option. In Outlook 2019, click File in the upper left hand corner and then select Account Settings.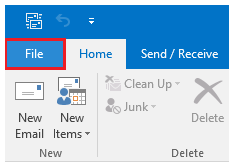
Then click "Add Account".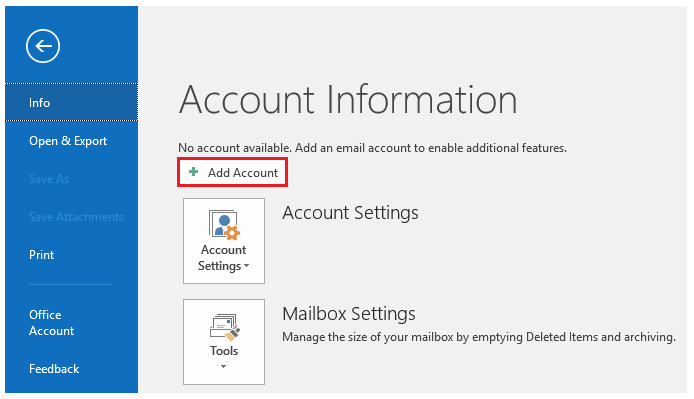
Next, type in your email address and click the Advanced Options drop down.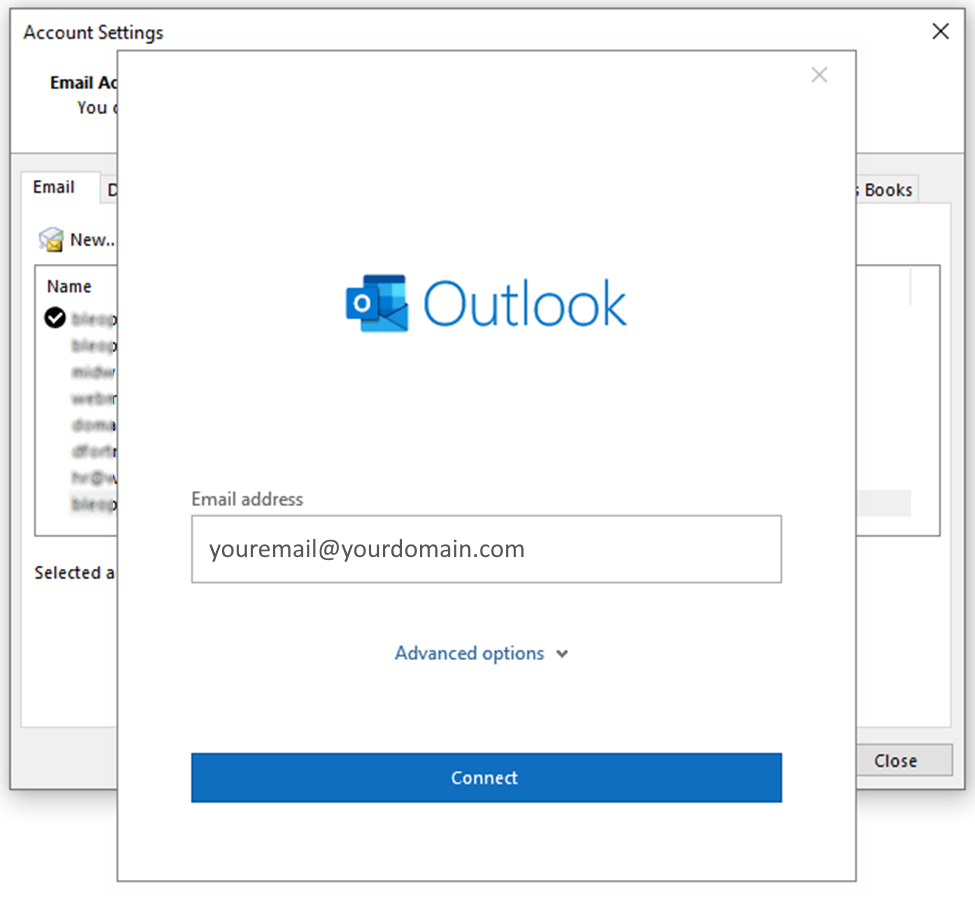
Check the box to “Let me set up my account manually” and click the Connect button.
Select IMAP. (For custom POP3 configurations, please see the section below titled "Other Clients and Port Settings".)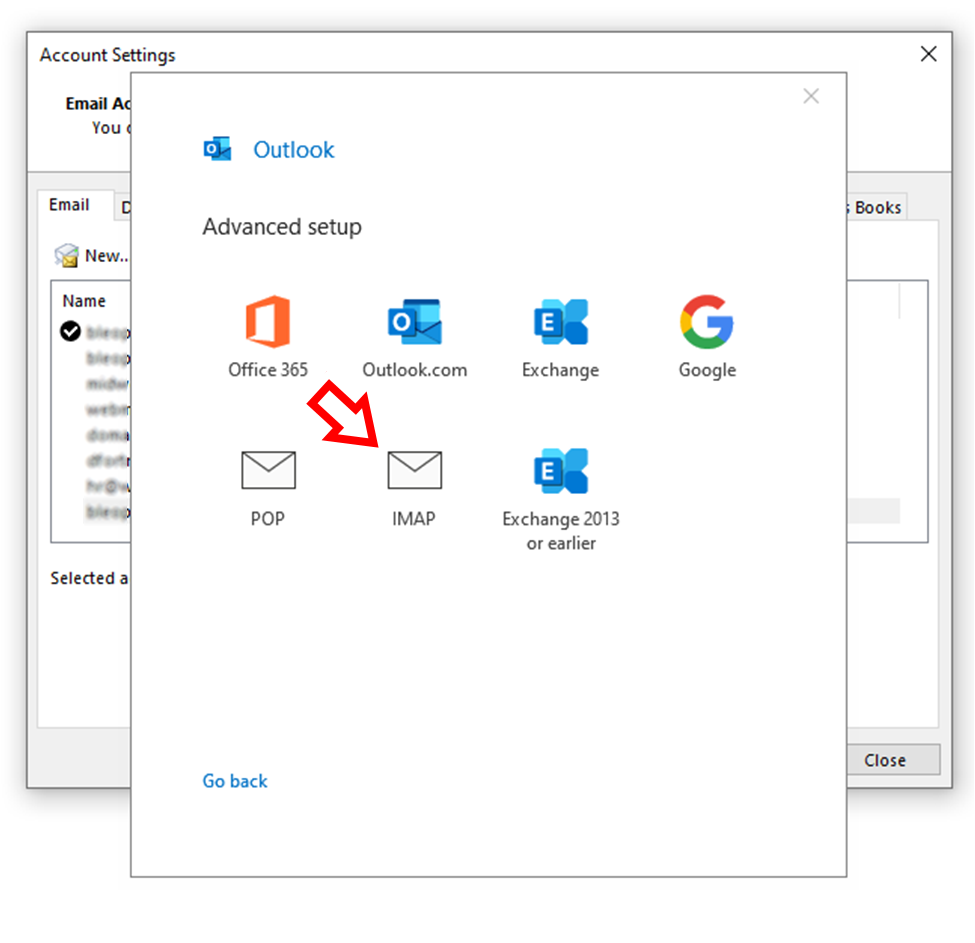
Type in your password and click the Connect button.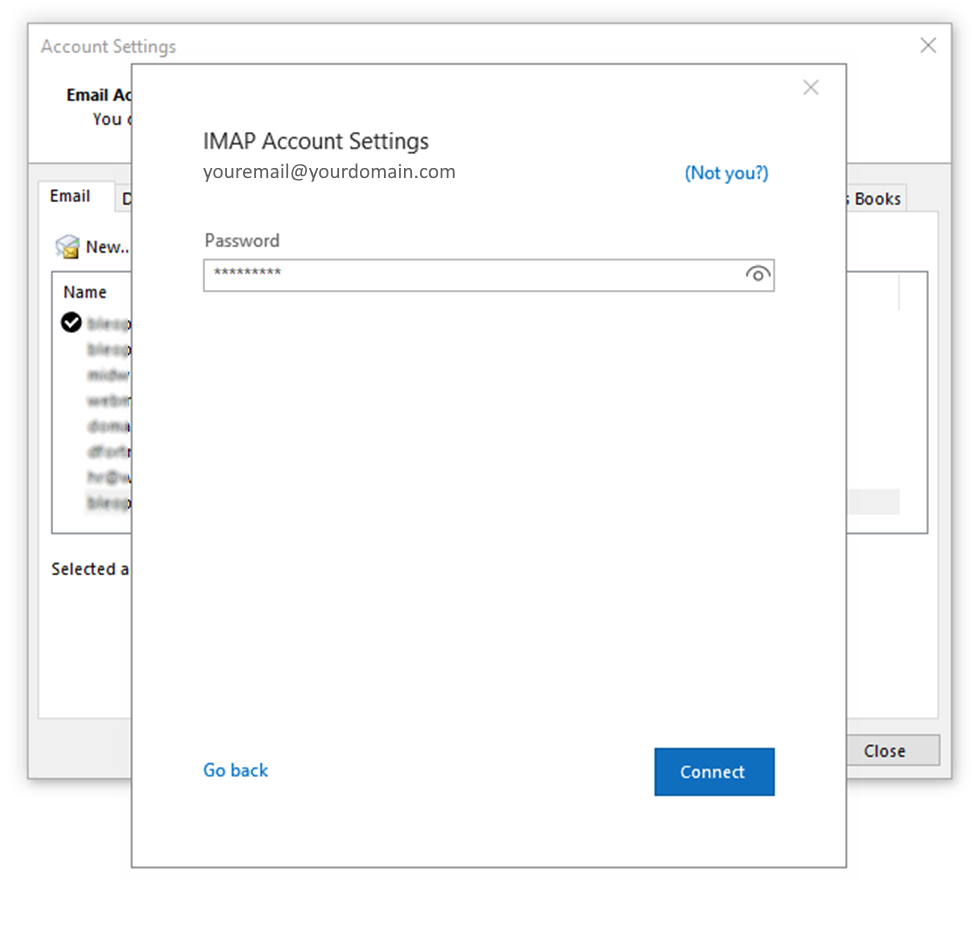
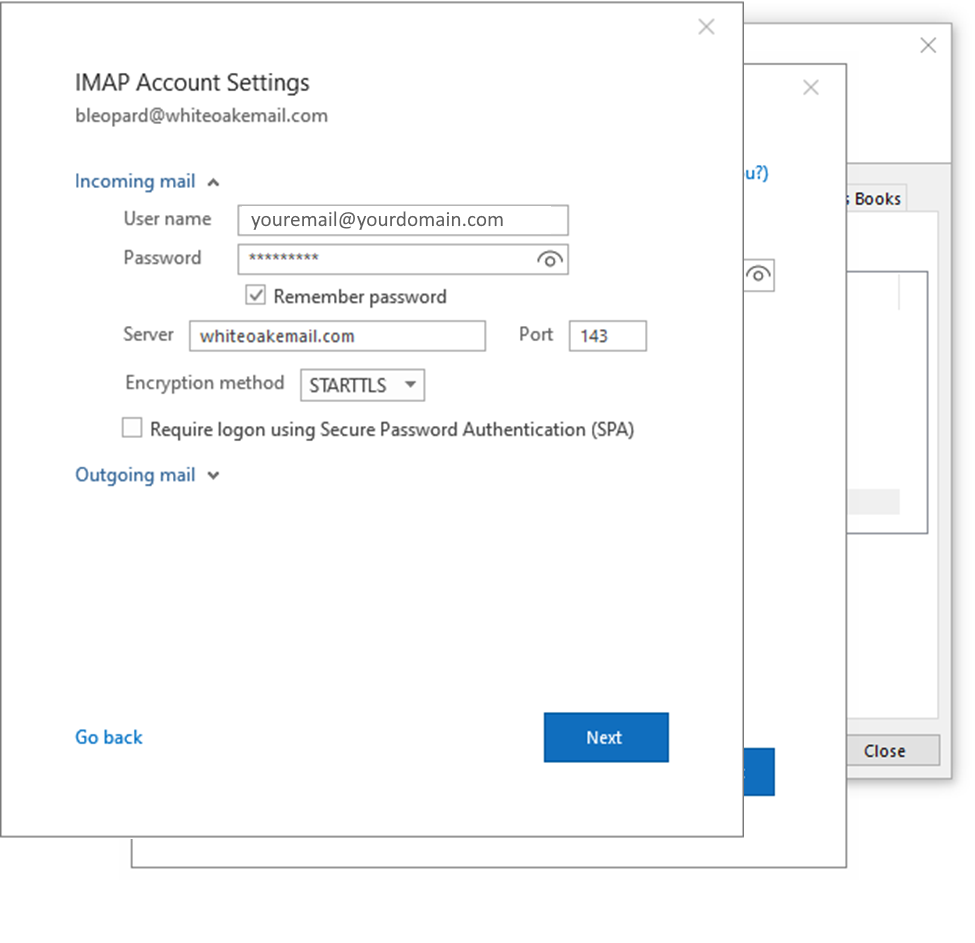
For Incoming Mail:
Type whiteoakemail.com in the server box and change the Port to 143 and the Encryption method to STARTTLS.
For Outgoing Mail:
Click the Outgoing mail drop down and set your server to whiteoakemail.com with Port 587 and Encryption Method STARTTLS. Then click next and your account will be created.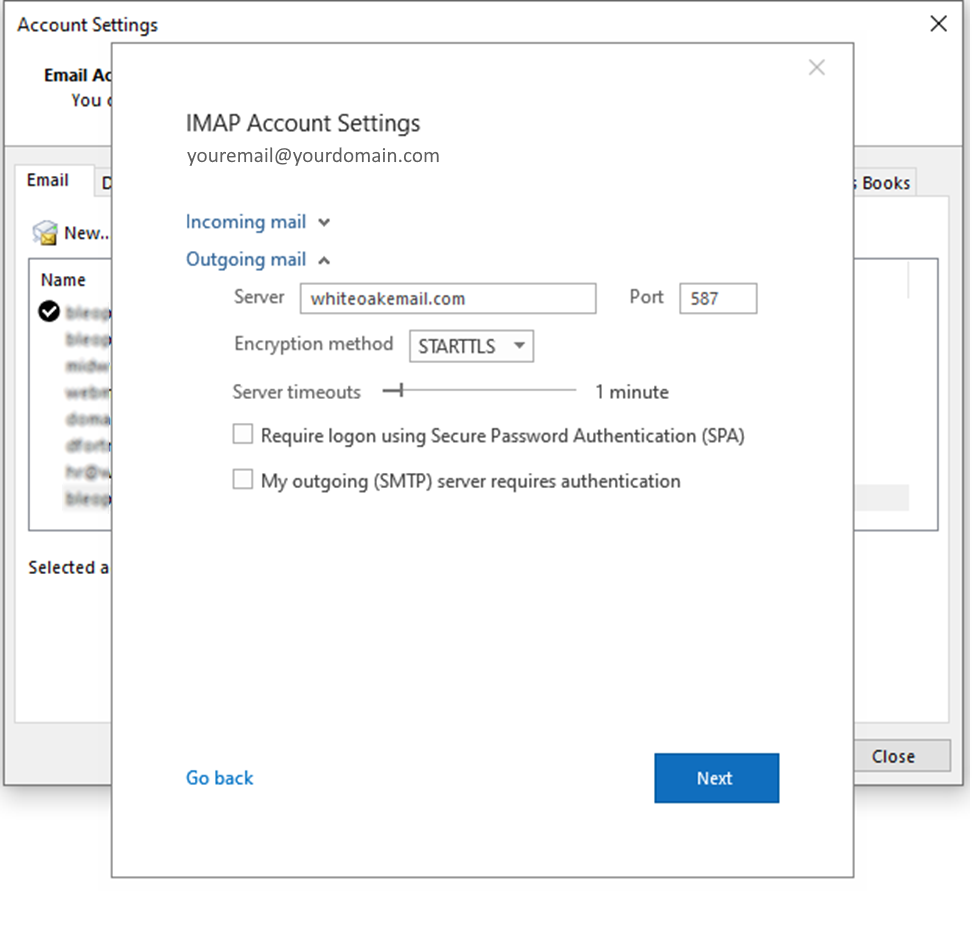
Setting up an account on an iOS Device
iOS Email Configuration
Need a paper copy? Click Here
These instructions will assist you with setting up email on your iOS device, including iPhones, iPads, and iPod touches.
First open the Settings application on your iOS device and select the Password & Accounts.
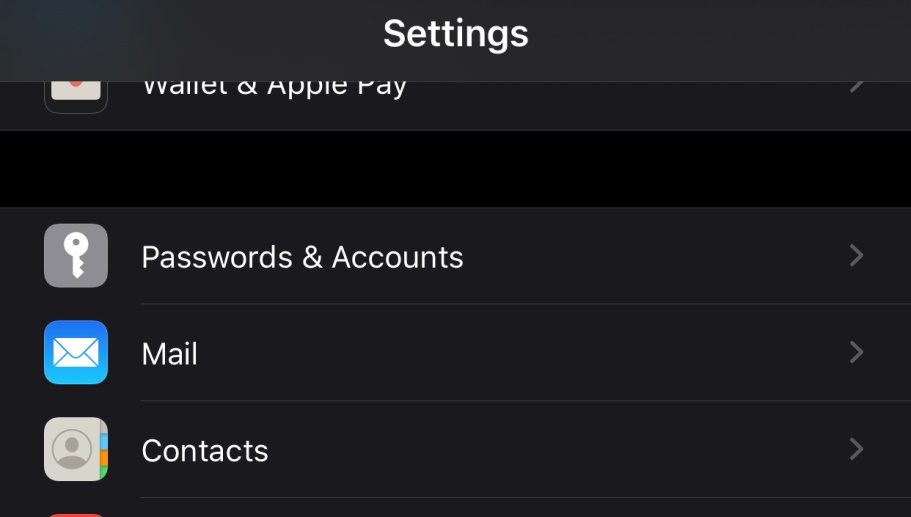
On the Passwords & Accounts screen, select Add Account.

On the following screen you will need to select Other.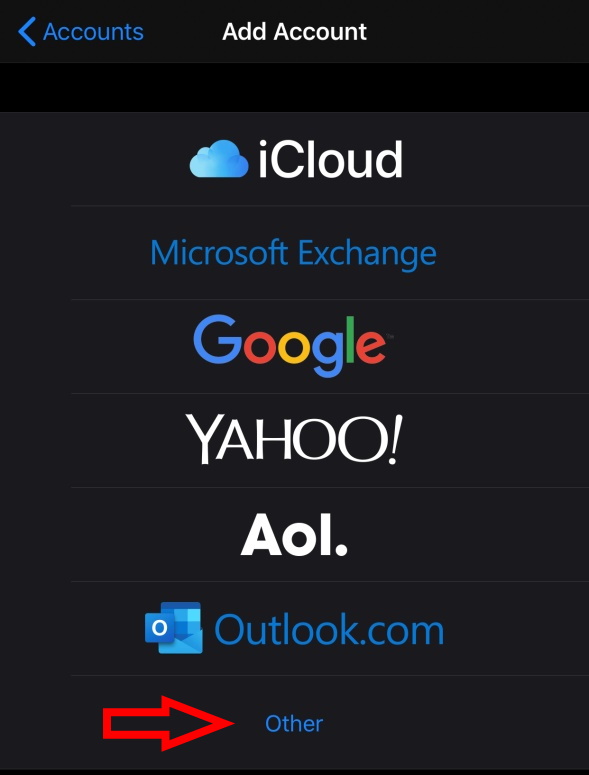
Once on the "Other" screen select, "Add Mail Account".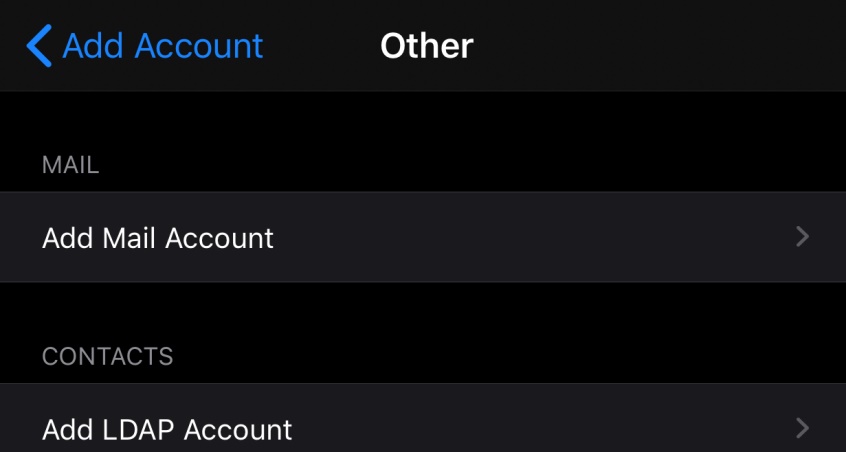
On the next screen you will enter your name, email, password, and description. Then click Next.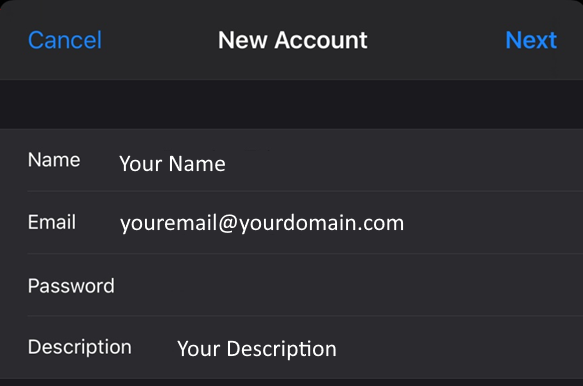
On the next screen you will see options for IMAP or POP, select IMAP and fill out your mail information. The Host Name will be whiteoakemail.com.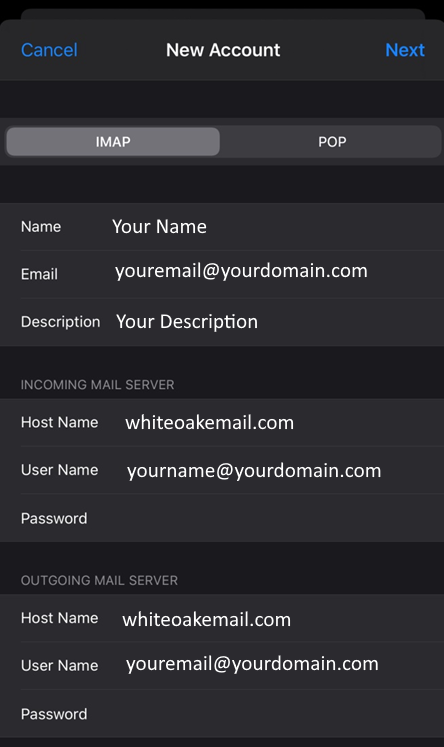
Select Next and you will be prompted with the following message.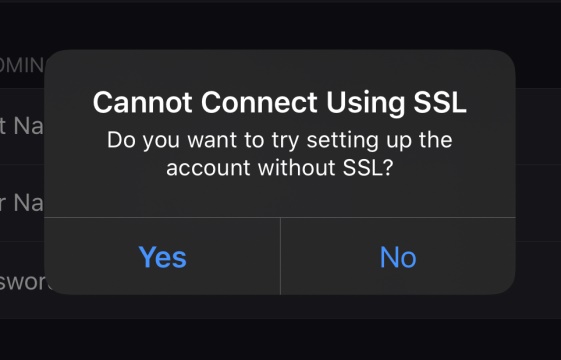
Select Yes. Whiteoakemail connects over TLS (More secure than SSL). Your iphone will then default to IMAP port 143 TLS and SMTP port 587 TLS. Click save and your account is now set up.
As always, call White Oak Technology Group Support at (309) 662-8243 if you need any assistance (standard support rates apply).
Setting up an account on an Android Device
Android Email Configuration
Need a paper copy? Click here
These instructions will assist you with setting up email on your Android device, including smartphones and tablets.
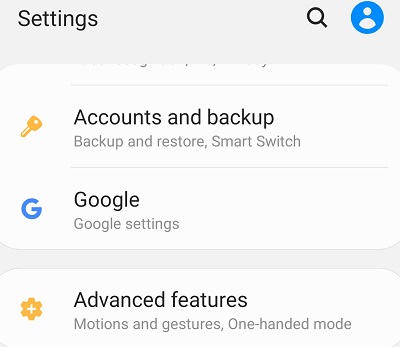
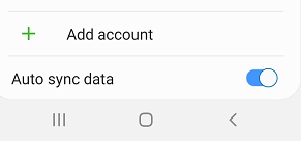
First open the Settings application and select Accounts and backup. On the Accounts & Backup screen select Accounts.
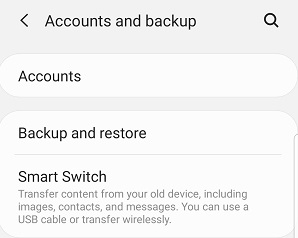
Scroll to the bottom of the page and select Add Account.
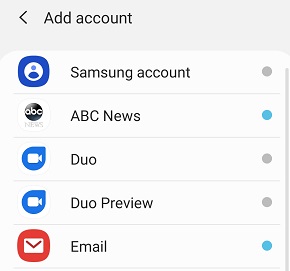
Select Email and on the next screen select Others.

Now you can begin configuring your email account. Type in your full email address and password and select, Sign In.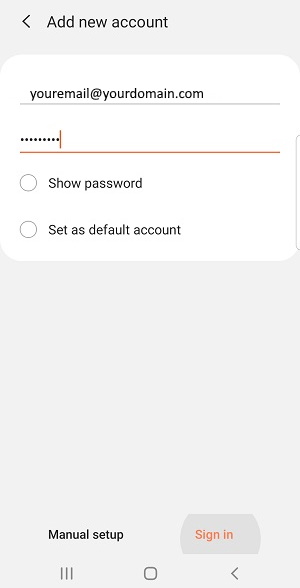
Select IMAP Account on the Select Account type screen.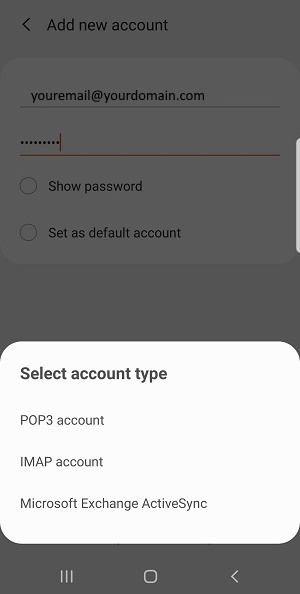
Enter your email address, your use name which is your email address and your password.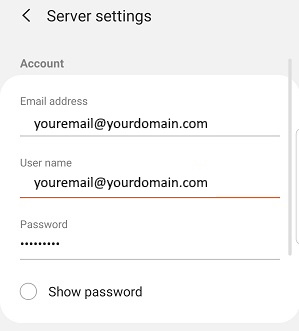
Incoming Server Settings
Remove the imap. from in front of the imap server. It should read whiteoakemail.com. Click the drop down under Security type and select TLS (Accept all certificates) and make sure the port number is 143. Leave the IMAP path prefix blank.

Outgoing Server Settings
Remove the smtp. from in front of the SMTP server. The SMTP server should read whiteoakemail.com. Click the drop down under the Security type and select TLS (Accept all certificates) and make sure the port number is 587. Turn on "Require authentication to send emails". Click the Next button and your email account is configured.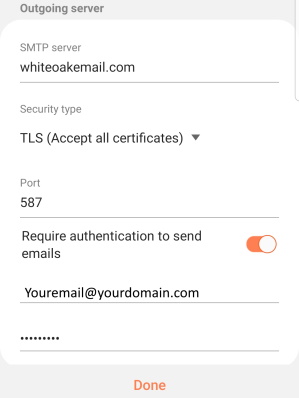
As always, call White Oak Technology Group Support at (309) 662-8243 if you need any assistance (standard support rates apply).
Other Clients and Port Settings (SMTP, IMAP & POP3)
General Email Settings
The TLS settings below will only work when a mail client is set to connect to whiteoakemail.com and TLS is enabled. Any RFC compliant mail client such as Outlook, Outlook Express, Thunderbird, and many others will work. When setting up outgoing mail, please ensure that you configure it with your username and password because user authentication is required with outgoing email. It is also important to note that port 25 is now blocked by the majority of ISPs, please ensure that you are using the settings below to properly send email.
| Settings to use with TLS | |
|---|---|
| SERVER (Incoming and Outgoing) | whiteoakemail.com |
| USER | Your full email address. (e.g. "youremail @yourdomain.com" not "youremail".) |
| PASSWORD | The password you configured with White Oak Technology Group. |
| IMAP PORT (Incoming) | 143 |
| POP3 PORT (Incoming) | 110 |
| SMTP PORT (Outgoing) | 587 |
Using the Webmail Interface
White Oak Technology Group Webmail
White Oak Technology Group provides a webmail interface which allows clients to log onto their email accounts from anywhere with a standard web browser and connection to the Internet.
Supported Browsers
- Microsoft® Internet Explorer version 11.0 or later
- Mozilla Firefox version 40 or later (for Microsoft Windows and Macintosh)
- Safari version 10.10 and later
- Google Chrome version 40 and later
Accessing Webmail
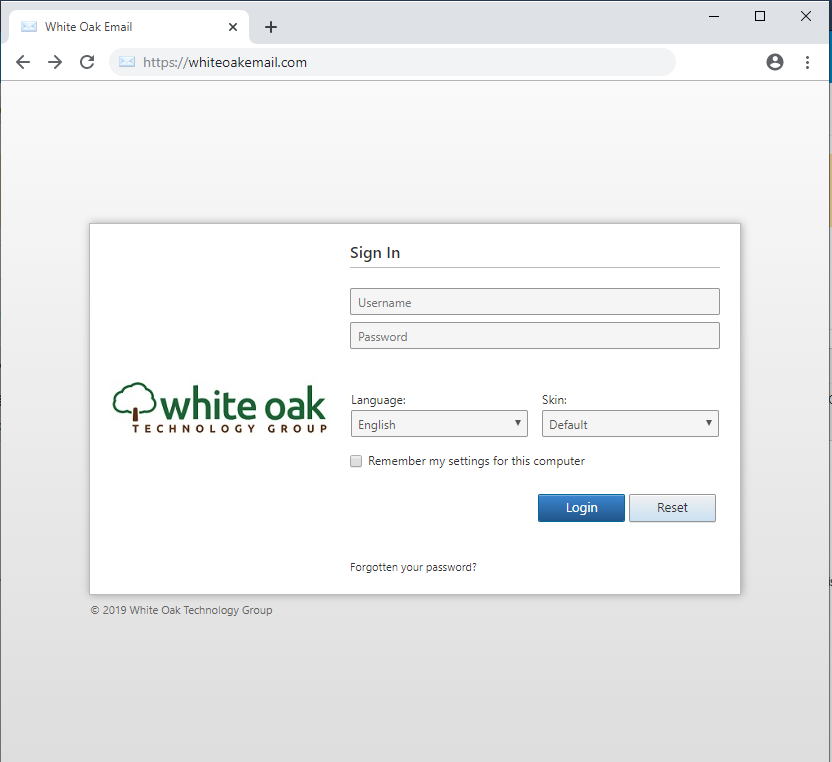
To access White Oak Technology Group webmail, simply type the URL address below into the web browser, and press the Enter key. The URL address is:
https://whiteoakemail.com
Once you arrive at the login screen (see graphic below):
- Enter your Email Address (e.g. [email protected]) in the blank provided.
- Enter your Password in the blank provided. You should have received your password from your Webmaster or from a member of the White Oak Technology Group Support staff.
- Click on the Log in button.
- If you forgot your password click the "Forgotten your password?" at the bottom of the screen and type in your email address and follow the prompts.
Once your have logged into your email account you can access your email, contacts, calendar and set up tasks for yourself.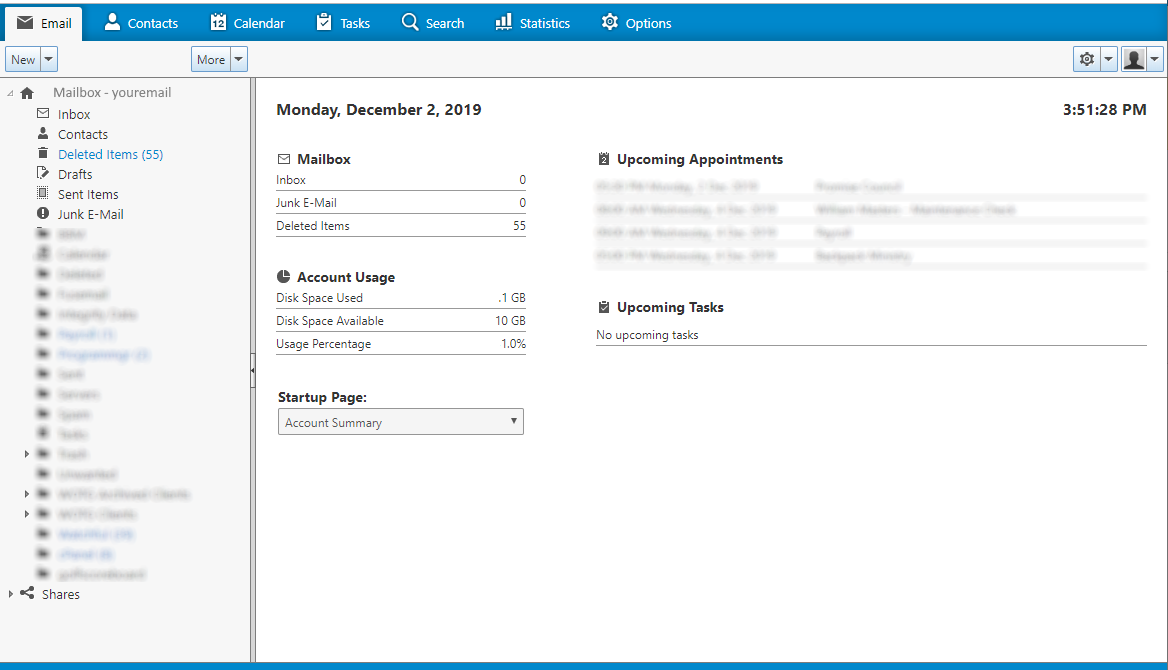
Within the Options menu, there are options enabling you to set up mailbox rules, and change your account preferences (including your password).
Remember to click the Logout button by clicking the down arrow next to the profile icon in the upper right hand corner when you are done using the White Oak Technology Group webmail client.
Spam Protection
Fusemail
In addition to the spam protection provided by our mail server, White Oak Technology Group also offers Fusemail anti-spam services. Fusemail is a third-party software product that intercepts spam before it arrives at the mail server and keeps it from filling up your inbox. White Oak Technology Group provides Fusemail services to hosting clients for a low monthly fee. Call us at (309) 662-8243 for details.
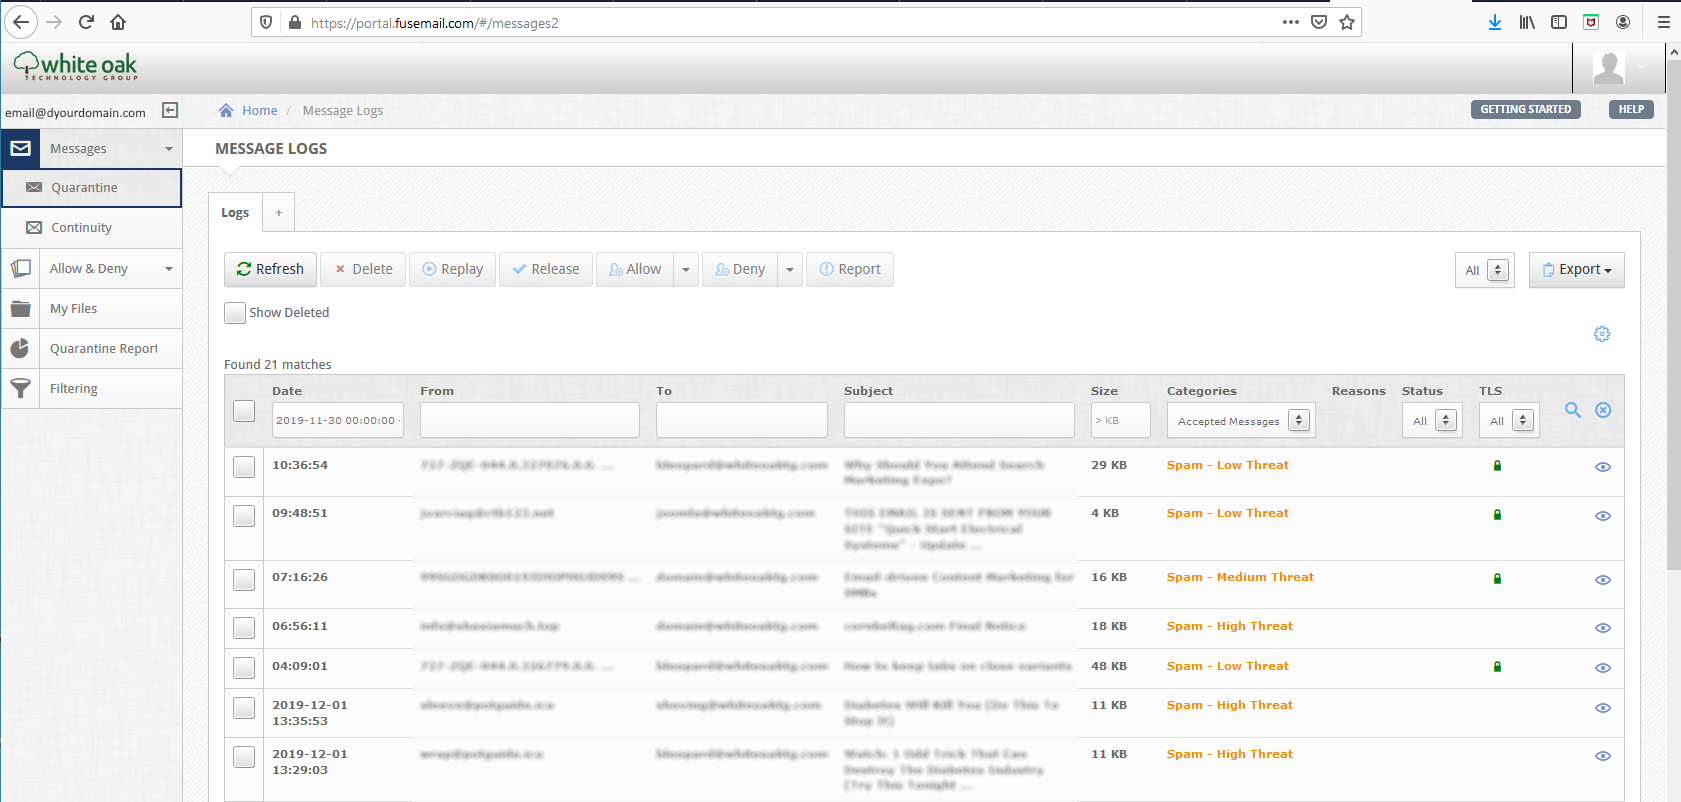
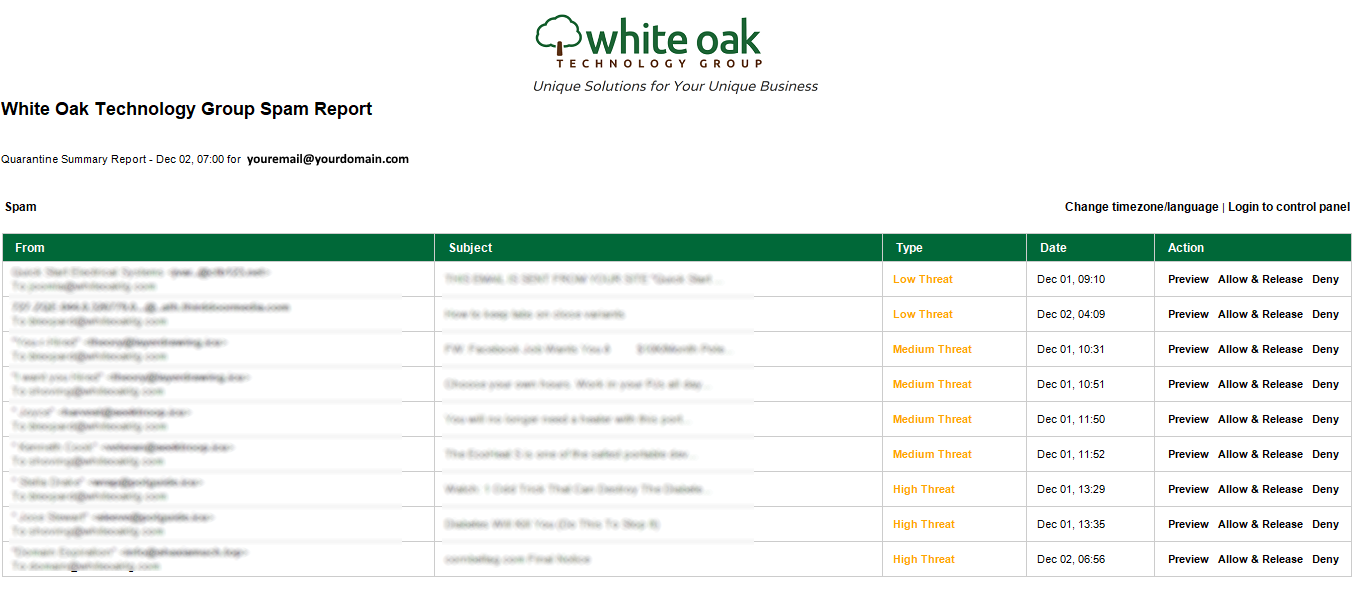
When your Fusemail account is activated, you will receive a weekly summary report listing all of the emails that were filtered during the past week. You can view these emails directly from within this report and release them to your inbox as you see fit. You can also open your email quarantine from within this report in order to view/release all filtered emails.
If you want to connect to your quarantine directly without waiting for your weekly report, you can direct your browser to https://portal.fusemail.com/#/login. The first time you access this site, type in your email account and click forgot password. This will redirect you to a screen to set your initial password so you can login.
Once logged in you will be able to see all of your quarantined messages, set the frequency of your spam report and white list or black list any domains or email addresses.